* See the complete project links here.
Showing posts with label balustrade. Show all posts
Wednesday, May 23, 2012
TAH-DAH !
* See the complete project links here.
Saturday, May 19, 2012
BUILDING THE BALUSTRADE, PART 5
![]() |
| Gathering installation tools |
![]() |
| Centering the first baluster |
![]() |
| Leveling the first baluster |
![]() |
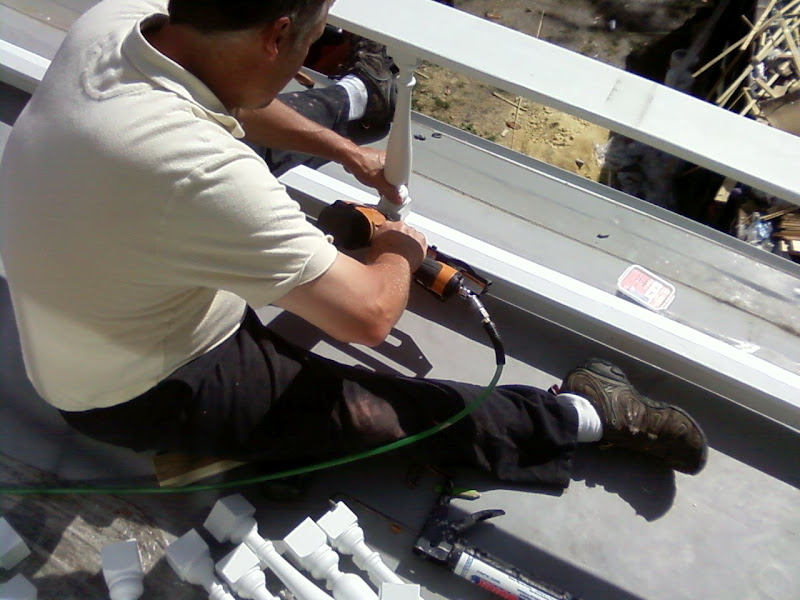
| Gotta love the nail gun |
![]() |
| 12 down , 228 to go |
![]() |
| A portion of the balustrade as seen through my bedroom window |
![]() |
| A block is used as a spacer in order to level and insure equal distance between each baluster |
![]() |
| Another block at the top lines up the balusters |
![]() |
| The power driver and brute strength are some of our best tools |
![]() |
| Each top rail (part of a 3-part assembly) is cut to size |
![]() |
| A curved portion of the post is removed for a custom and snug fit |
![]() |
| The cap from the original post is incorporated into the final post on the north side of the house |
![]() |
| Balusters, rails, trim are all attached and ready for the painters to caulk and give the new balustrade its final coat of paint. |
Satisfaction for a job well done.
* A photo of the completed balustrade to be revealed at a later post.
Friday, May 11, 2012
Tuesday, May 8, 2012
BUILDING THE BALUSTRADE, PART 3
As I mentioned before, this is not just a weekend project.
A total of 240 turned balusters must be cut to exact specifications.
![]() |
| A portion of the primed balusters await milling |
![]() |
| 3/8 of an inch comes off the top end |
![]() |
| Taping off the bottom end getting an angle cut helps prevent splintering |
![]() |
| Each bottom end runs through the table saw twice at a 12.5 degree angle. |
![]() |
| Like soldiers all in a row |
![]() |
| Short end squares |
![]() |
| Long ends with 12.5 degree pitch |
![]() |
| What a mess we made in Billye's room! |
Monday, May 7, 2012
BUILDING THE BALUSTRADE PART 2
![]() |
| The bottom rails we put together last weekend were purposely longer than required |
![]() |
| We measured and cut each bottom rail to size |
![]() |
| Propping a section of rail on a 2x4 at each end gives us a visual of how it will look. |
![]() |
| Cut to size rails are laid out and marked for location |
![]() |
| Half of the 250 balusters, primed and ready to be cut to size |
![]() |
| A sample section of the railing |
On to milling the 250 primed balusters!
Tuesday, May 1, 2012
BUILDING THE BALUSTRADE
We now are continuing the task of building the balustrade.
We are taking a pile of wood and ripping it.
![]() |
| (What a pile of sawdust!) |
We are stacking it.
![]() |
| (The grain must go in the same direction.) |
We are gluing and clamping it.
We are routing it.
![]() |
| (Before routing) |
![]() |
| (After routing) |
We sanded it.
![]() |
| (Billye helped sand.) |
![]() |
| (Wallace used the orbital sander to get the saw blade marks out of the wood.) |
Friday, April 6, 2012
A POST POSTING
The time has come to reproduce the balustrade on the roof of the front porch....
starting with the posts.
Using a post found in the basement, we started and assembly line.
![]() |
| Fir boards are cut to size |
![]() |
| Pressure treated wood is run through the table saw and given a bevel . Result....8 post caps |
![]() |
| The fir boards are primed and nailed together into boxes |
![]() |
| Each box forms a sleeve around the 6 x 6 pressure treated post built into the roof structure |
![]() |
| Each post box is leveled and attached, leaving an inch of space between post and roof |
The next carpentry project for me is fabricating the rail and building the balustrade.
Friday, March 25, 2011
Subscribe to:
Posts (Atom)