Pages

Showing posts with label brickwork. Show all posts

Friday, October 23, 2015

AT THE REQUESTOF SOME

    At the request of some of my friends and blog followers, I am going to peck out a few more entries to this blog.

    Since I stopped posting on a regular basis some time ago, there has been progress on our house and, more notably, our yard.  For close to 2 years I put down my power tools and picked up my shovel and mattock, rake and pitchfork.


Hardscape was added and our antique brick got new life as colums and a circular planter.


The only plant life worthy of salvaging were the azaleas, the magnificent Magnolias, 2 tremendous maples, an old pecan tree, a very large holly and, of course, the bamboo!

 
    Heavy equipment took out years of brush and weeds, and I designed some curves into the landscape to soften the squareness of the large patio/basketball court.


My daughter and I tote water to the garden behind the garage,
at least until we get the rainbarrels connected.

My son gifted me with yardwork last Mother's day. This included
digging out the original but long neglected pond in the back yard.

 All this happened 1 1/2 years ago.  I've been digging and planting ever since.  Good thing I love it so much!  We now have grass and loads of plantings.

There is more to come.  Keep an eye out for more recent photos and coments.

Monday, September 1, 2014

AS YOU WERE, CONTINUED

The brick work began.  

We trusted the brickwork to Alan Swan and are thrilled with the results.

    Work began in the front where original brick, salvaged from fallen chimneys, was used to errect brick pillars alongside the entrance.  All we had to go on was the original brick footprint of the pillars and a small photograph c. 1910 of the house at a distance.  Basing our decision upon the style of the time (1907), we decided upon a stone cap and a simple brick pillar.

Going up!

Left pillar
Right pillar


Sunday, March 24, 2013

EUREKA !

    In clearing the sidewalk in the front yard yesterday I made a discovery. 


 Remnants of a brick foundation were buried beneath the soil on either side of the sidewalks along the driveway.


We knew, based on a photo of the house in 1910, that there were columns by the entrance to the yard.  Finding the buried brick shows us exactly where we should rebuild the columns.

Oure Hawthorne house is the first house on the left


Sunday, June 3, 2012

WHAT'S THE POINT?

    I learned something new this morning.  As we worked to repair the porch steps, we discovered some loose and missing bricks in the piers .  What I learned was how to mix mortar and how to tuck point bricks.  Kinda fun.

Mixing mortar

Mortar on the cleaned brick

Mortar side of brick to be added

Place brick and move slowly to level

Re-pointed brick prior to cleaning face

Attempt to match the old points on the original pier

Certainly I need more practice, but it's good to know I may have some level of skill when it comes time to repair the old brick fish pond or constructing a brick patio (both tasks I have put on my 
TO DO list for the future).


Saturday, January 21, 2012

BEFORE & AFTER

   I am a fan of the before and after shot, especially when there is such a dramatic change.   There will be many such comparisons with this house.   Here is just one to get started...


BASEMENT WINDOWS...BEFORE


BASEMENT WINDOWS...AFTER
 

The windows are new replacement windows and the brick bays we have had built using the old brick from the collapsing chimneys.  We think the brick mason did a great job matching the style of the original foundation.  Not only has this renovation resulted in a more pleasing aesthetic, but also it has made the house more secure and protected from rains.

* Note : The drip cap and trim above the windows is also new.  Large sections of the original trim had rotted due to long time water damage (see the repair here).  We had the original trim duplicated and Wallace, Donnie and I installed it.


Sunday, October 16, 2011

BRICK BY BRICK

    Slowly (because the weather has been rainy and progress hinges upon framing and inspections) but surely (the masons are working on a Saturday!) my wood burning fireplace progresses.  


August 4,  2011

October. 15, 2011

Nothing about this project has been speedy.  It is, however, being done right  (Thanks mostly to our Donnie's *  keen eye for detail and extensive knowledge about construction and repair of old homes)
  

* "Number One",  your room on the 3rd floor will always be here for you!


Monday, August 15, 2011

FROM UGLY TO BEAUTIFUL IN UNDER 2 DAYS

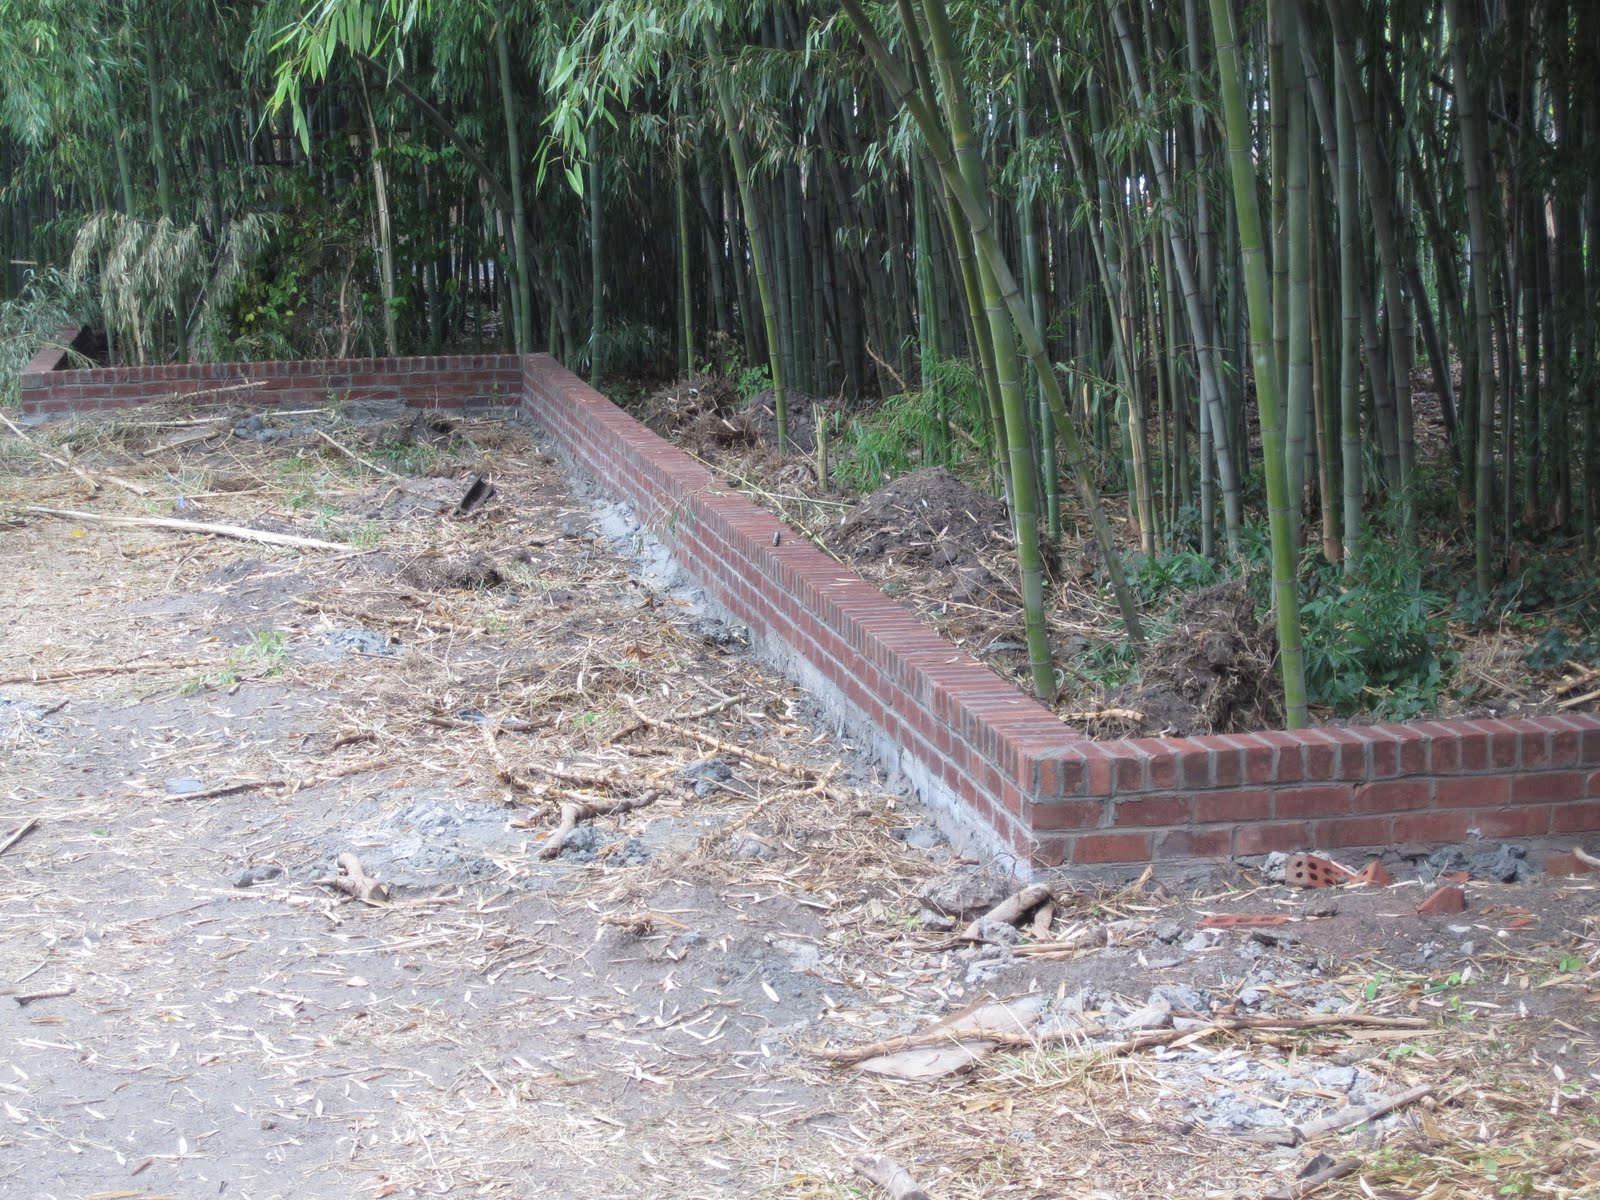
    We have had a great brick mason here on Hawthorne Avenue this past week.  (See yesterday's post )  He has worked so swiftly and well that we have hired him to construct a small brick wall to cap the concrete-filled ditch built to contain the aggressive bamboo.


An excavator dug a ditch 18 inches deep and 12 inches wide.  


After the ditch was filled with concrete it looked as if it were a lava trail.  Very UN-attractive. 
Using the garage foundation brick, a close match to the original, the mason has just completed a beautiful wall.


Sunday, August 14, 2011

NEW BAYS

    Our basement has 6 windows....all in such disrepair that we have new windows on order.  We will soon rebuild the sills and replace the windows, vastly improving the look and security of the house.

If you can, look past the dilapidated windows and rotting sills, and take a gander at our new bays!


We excavated approximately 10 inches below ground level.  The mason leveled and laid  block upon which he laid 4 runs of the original brick  (  Remember the chimneys we took down  back in May? )  Each corner has been finished with 45 degree angle cuts.


The brick is purposely not pointed, mimicking the foundation on the original house.


The 3 bays on the south side of the house are so close together
 that they demanded a different brick configuration.

3  bays on the north side of the house


    We are thrilled with how they have turned out.  The use of the old brick makes such a noticeable difference.


Saturday, August 6, 2011

JIGGETY FIG JAM


   Two days ago I had to severely trim my fig tree.  The tree grows on the south west corner of the house and, since April , it has been working on producing figs. (Yes, I realize producing fruit is a year-round process but the first visible fruit appeared back in April)  This made it difficult to cut the tree back so harshly.....and yet.....the brick mason had to build the new fireplace and chimney. My mom assured me that, in her experience, a fig tree can take some punishment from the loppers and be none worse for wear.  So, fingers crossed, prune it I did.

 
    Before I cut the tree back I picked all the ripe fruit.  I believe I harvested fruit before the local bird and squirrel population knew it was ready to eat because I got enough to make some preserves.

    Having never canned anything in my life I was a bit nervous about how and if it would turn out.  Searching the internet, I looked for a recipe that was touted not only tasty, but also fool-proof.  Recipes for strawberry fig preserves kept popping up.  Online comments about this type of preserve indicated it met my 2 top criteria (tasty & fool-proof) and, in addition, the seeds in the figs mimic strawberry seeds so the end product is more appealing to a, shall I say DISCERNING audience.


    The recipe I used yielded 6 cups of preserves and I used 4oz. jars so I have more small tastes to share with family and friends.  Those who know me also know I rarely follow a recipe 100%.  I have to admit I strayed, but only slightly.....adding approximately a tablespoon of fresh lemon juice while boiling and stirring.

The result......YUM !!!